
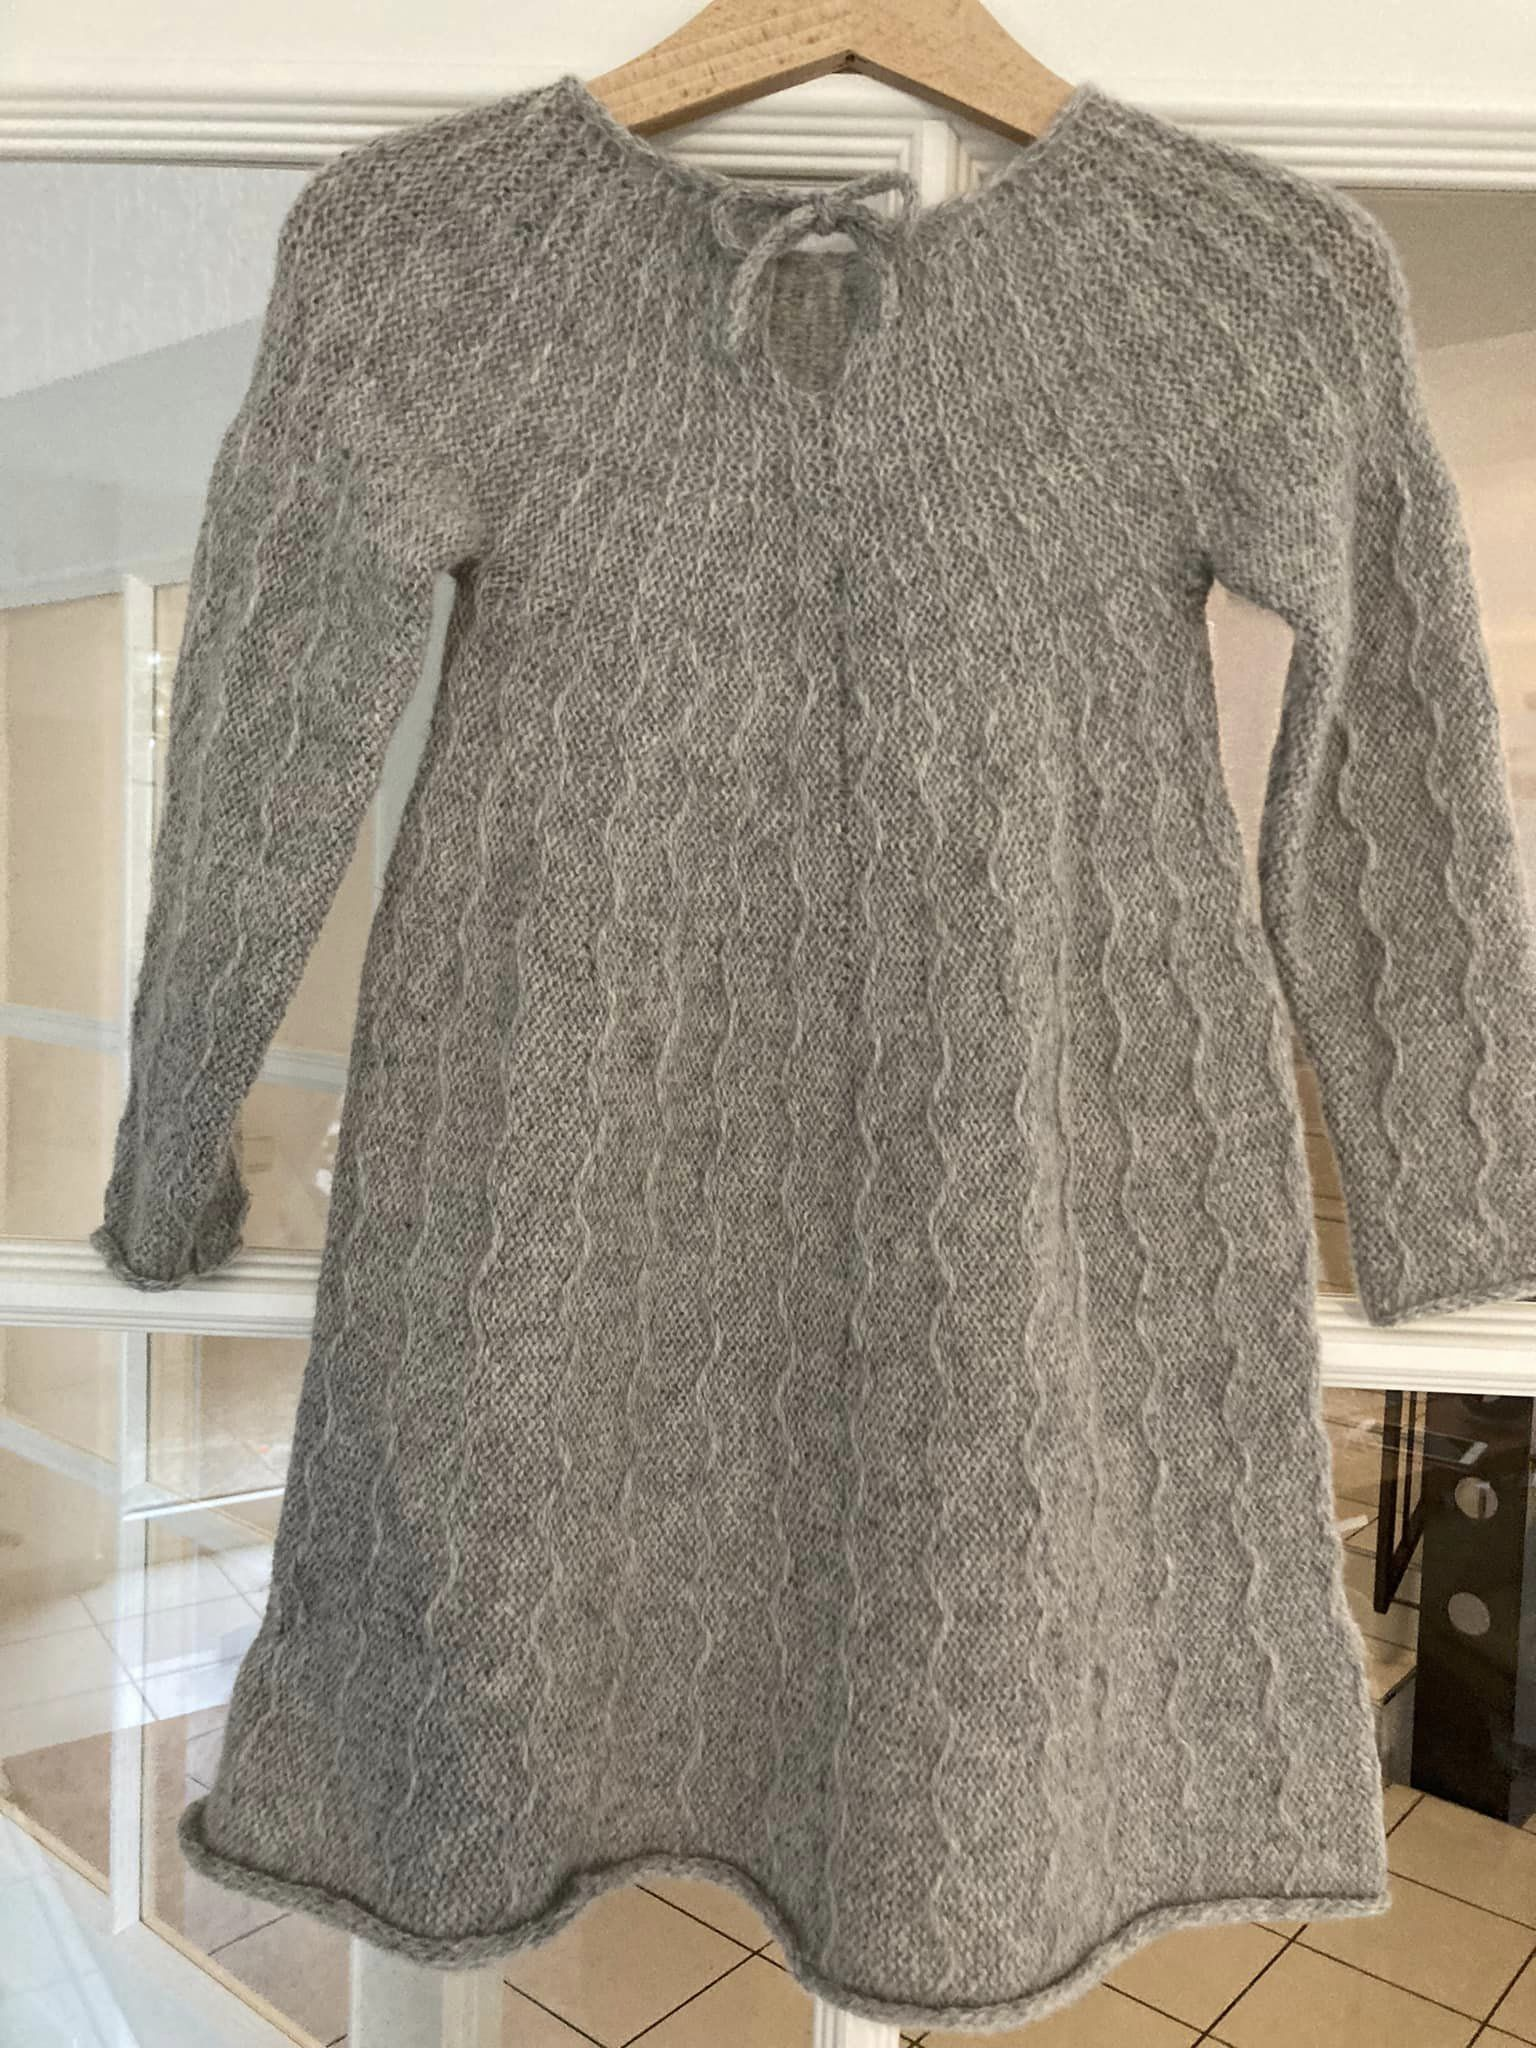
Knitting an entire dress with long sleeve on a knitting machine is an exciting challenge. But because it is knitted from the side it is not so difficult as it might seem on the first look. I am sure, once you try it, you’ll get addicted to this way of knitting.
This example showcases a child’s dress; however, with a few adjustments, you should be able to knit an adult-sized dress approximately 74 cm (about 29 inches) long. I haven’t attempted this yet, but it’s on my to-do list.
Machine Requirements:
For this child dress, you need an electronic knitting machine capable of handling a pattern width of 135 stitches. I used a KH 910 model equipped with an eKnitter mainboard, which supports wider patterns. This setup allows for greater flexibility in design, letting you create beautifully pieces.
Materials Needed
- Yarn: 50 g = 350 m, Needle size 2.0 -2.5 mm, Type: ball
- Composition: 100% Wolle
- Color: dusty aqua
- Brand: FRAYA, by Selfmade.com
Designing the Pattern
The pattern was created by Sophie Da Na who has been a tremendous inspiration to me. A heartfelt thank you to Sophie for allowing me to share this pattern on this page and for her invaluable support and feedback throughout this eKnitter project.
Knitting Technique:
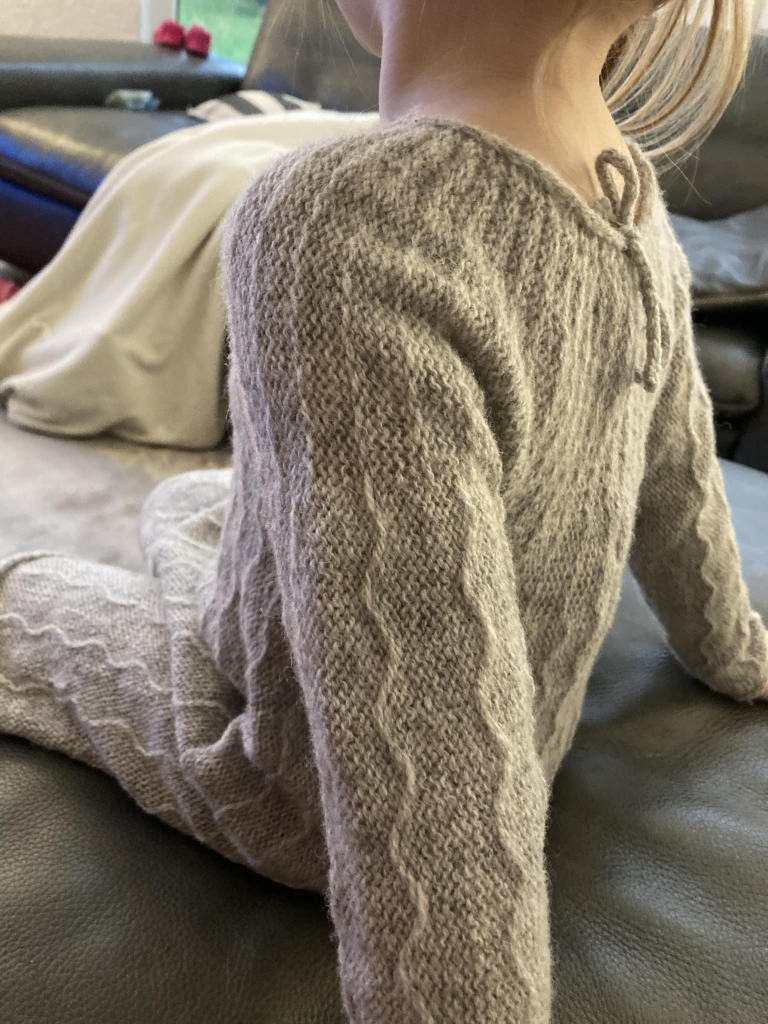
The dress is knitted sideways, meaning you only need to knit one piece. Automated short rows simplify the knitting process, making it seem as though the dress is knitted almost magically.
To knit a round yoke dress on the machine, we set the machine to not knit Slip Stitch pattern, which helps us create “short rows.”
Here’s how it works:
We set the machine to knit slip stitch patterns, which means the machine only knits some needles (these are shown as black dots in the image). These needles move to a position called D. Needles that are not activated do not knit and stay in a position called B, shown as white dots. This method not only helps us to form the curved yoke shape by knitting shorter rows in certain areas but also allows us to create a beautiful slip stitch pattern within the dress.
Front / Back

Gauge and Measurements:
Test Swatch:
For this type of knitting, it’s essential to create a test swatch, particularly when altering the pattern or using different yarn, as the gauge (rows per cm/inch) can vary from the neck to the bottom due to the short row pattern. Additionally, due to the ‘flaring effect,’ (how I call it) the pattern naturally widens as the length of the dress increases.
The "flaring effect" in knitting refers to the phenomenon where the width of a knitted piece increases as the length extends, similar to the shape of a cone. This usually happens in patterns that use shaping techniques like short rows, which add extra fabric in certain areas, causing the piece to gradually widen as you progress.
In the follwoing I describe how I proceeded:
First, I created a test swatch by repeating the body pattern several times. Then, I washed and dried it the same way I would handle the finished garment.
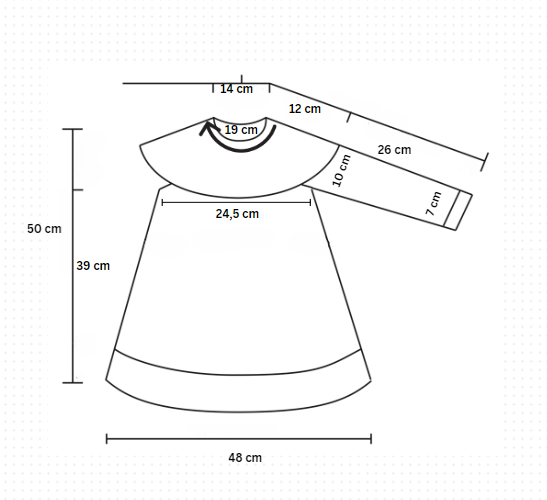
Next, I measured the width of one pattern repeat at the chest level on the swatch. This is where the chest line would be on the actual garment and is essential for perfect fitting.
In my case the width of one pattern repeat is 1,75 cm.
Body (Front/Back)
For the dress I need a width of 24.5 cm at the chest level, therefore I need to repeat the pattern 14 times for the front and 14 times for the back.
24,5 / 1,75 = 14
Sleeve
For the sleeve I need 20 cm (at chest level) and therfore I would need to repeat the pattern 14 times.
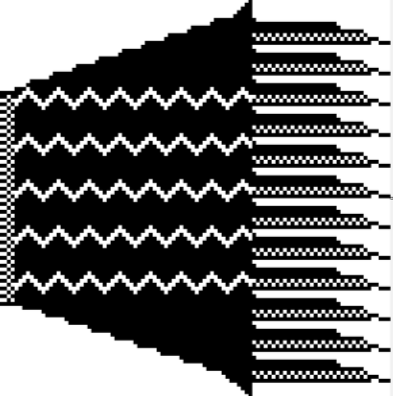
The image below shows that creating the long sleeve involves using a separate file. On the right side, you must include the correct number of pattern repeats for the yoke. On the left side, you shape the sleeve. In this example, the sleeve is designed with fewer rows near the wrist to make it narrower.
Knitting Steps:
- 1/2 BACK: Started by knitting the back of the dress, repeating the pattern 7 times. Set the sleeve needles out of work.
- Side Section: Knitted the side of the dress without yoke part (for more comfort below the sleeve). I only knit one time the pattern.
- Needles for the body were then put on hold afterwards.
- First Sleeve: With the needles for body on hold, start knitting the sleeve file.
- Front of the Top: Knit the front of the dress 14 time the pattern
- Side Section: Knitted the side of the dress without yoke part (for more comfort below the sleeve). I only knit one time the pattern.
- Second Sleeve: With the needles for body on hold, start knitting the sleeve file.
